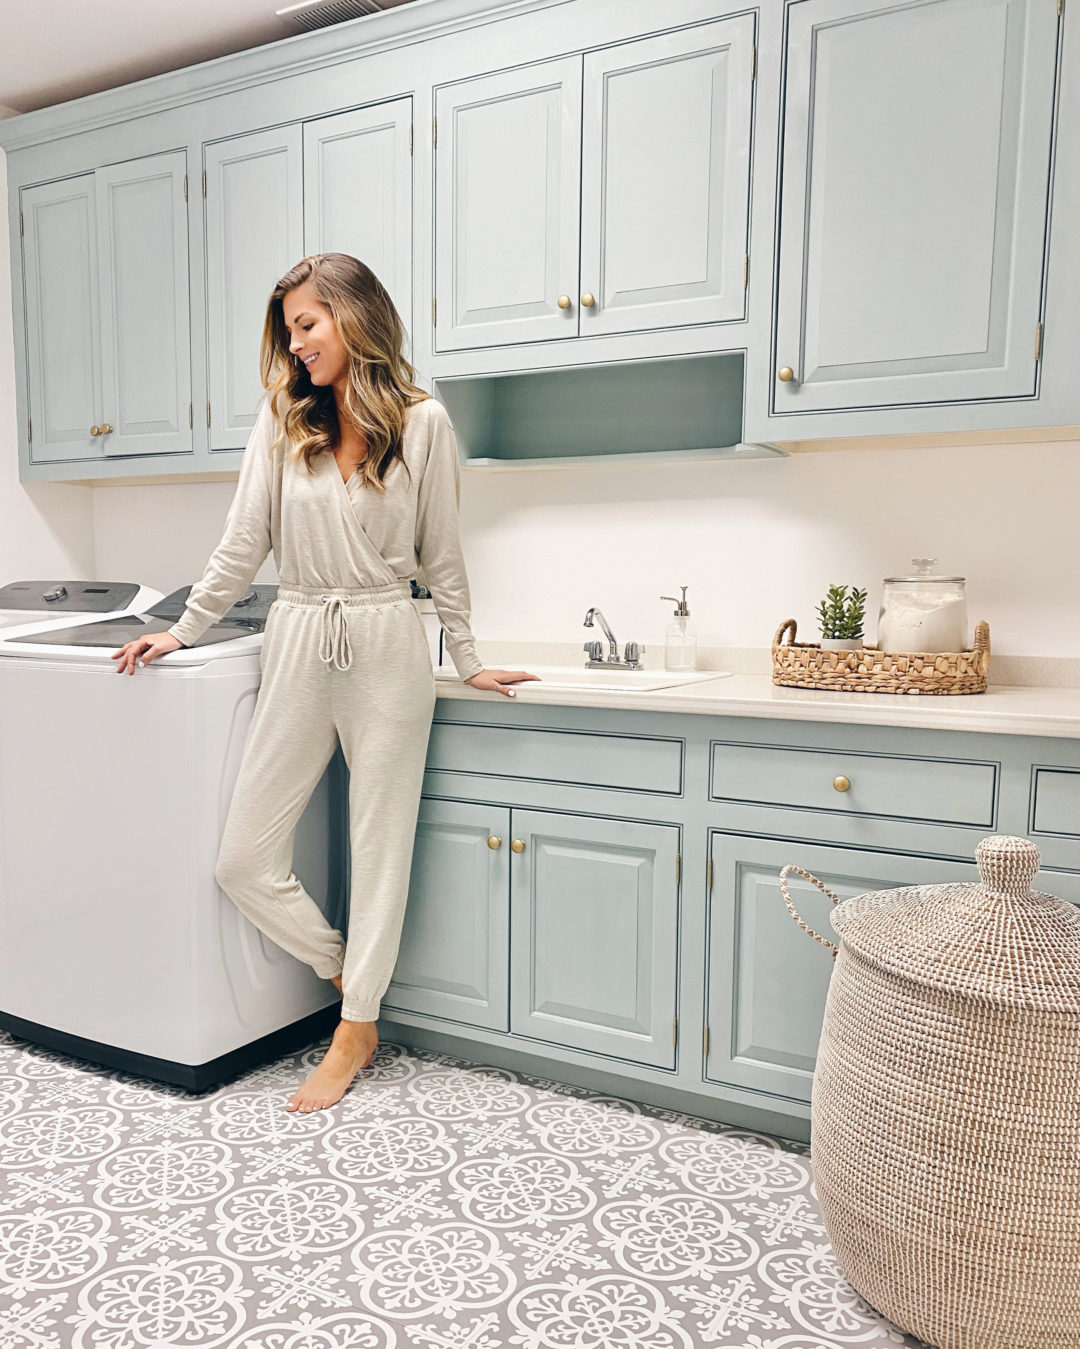
If you follow me over on Instagram you may know I’ve thrown myself into quite a few renovation projects in the last few months. From this budget powder room makeover to a complete kitchen gut, we’ve been busy with lots of house projects since we moved in October. Today I wanted to share our budget laundry room refresh and review the peel and stick tile we used on the floor in there.
Budget Friendly Laundry Room Makeover
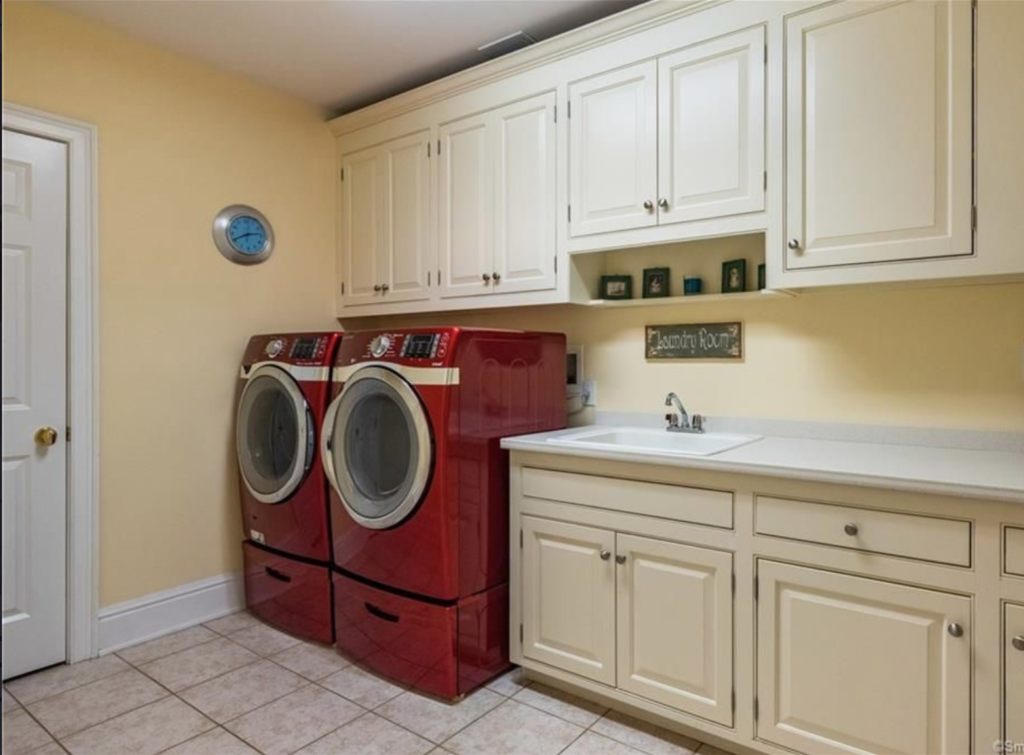
Below you can see a photo of our laundry room just before we purchased the house. The previous owners took the red washer and dryer. The walls were yellow, the cabinets were a creamy yellow, and the tile was a builder-grade beige with grungy looking grout. There was plenty of space, but I wanted to make it a bit prettier.
Because we are renovating our kitchen and refinishing our hardwood floors this spring, we had no budget for a laundry room makeover. With just paint and peel and stick tile we were able to give our laundry room an updated look. So many of you asked about these affordable peel and stick tiles so I wanted to followup with a review.
In addition to the tile I painted the cabinets with Americana Decor “Vintage” Chalk Paint and used Rustoleum “pure gold” spray paint on the existing hardware. We left the sink, faucet, and counters as is for now. You can see in the photo below I actually need to finish painting the cabinets. I was feeling a little burned out, but the underside of the cabinet needs a few coats of paint.
Peel and Stick Tile Review

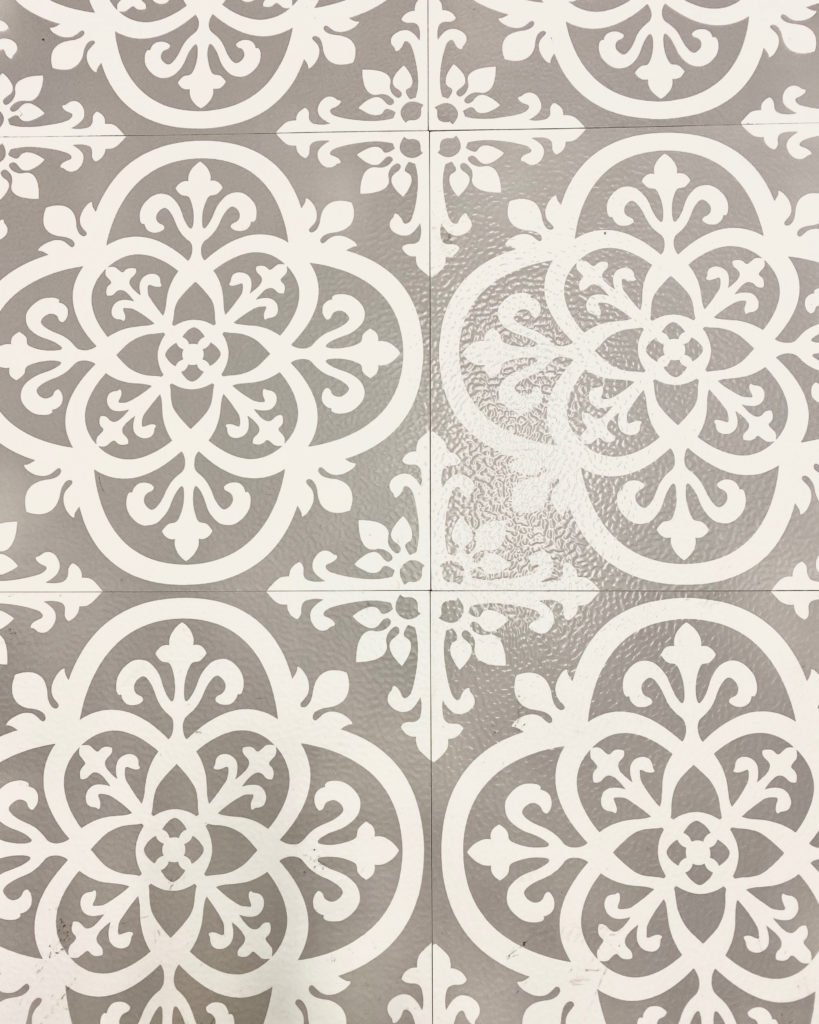
There are lots of options when it comes to peel and stick tile and almost all are budget friendly. We spent around $100 in materials to tackle this floor.
A FEW OF THE MOST COMMON QUESTIONS I GOT IN MY DM’S WHEN I SHARED THIS PROJECT ON INSTAGRAM STORIES:
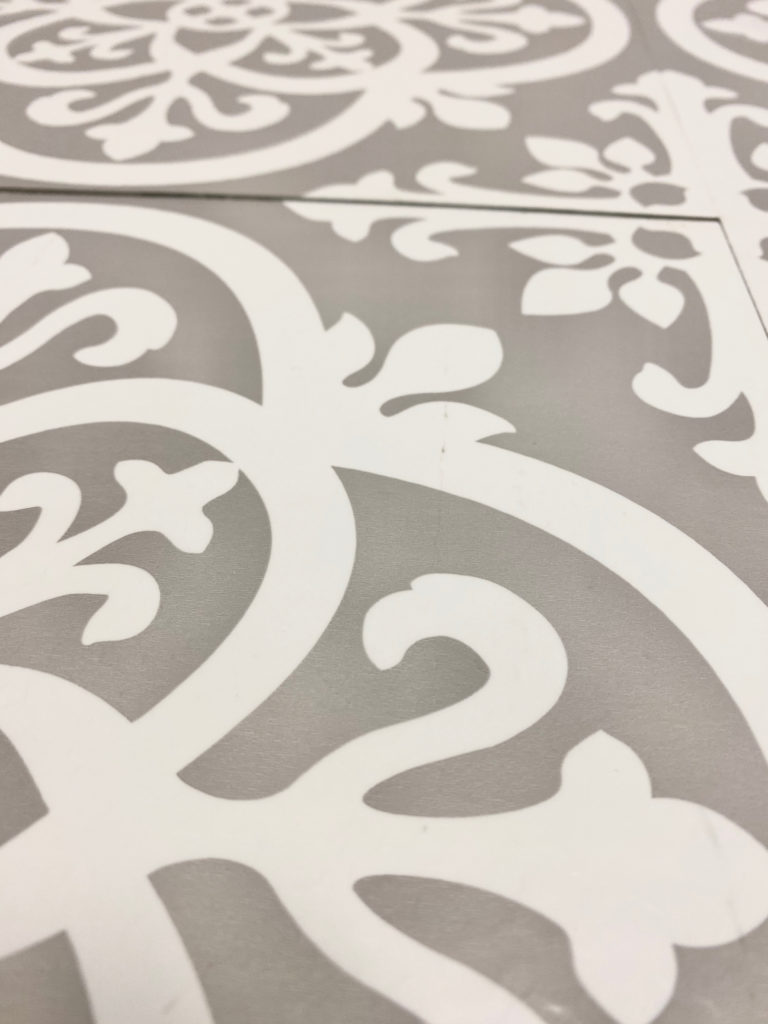
- Do they stay? People were asking me this as we were putting them down 🙂 but I wanted to wait a couple weeks to give my review. If you want to use these long term you can use additional adhesive below the tile, but most of them stuck fine. We rolled them (with a rolling pin) after each tile was placed over the existing tile. You can see in the photos below some edges are coming up a bit. We plan to eventually retile this room so we opted not to use additional adhesive. Placing heavy books and detergent bottles at corners helped many adhere better than just using the rolling pin.
- Was the previous tile flat? No, not at all. The tile underneath had a very uneven surface and big grout gaps, which made the final result a bit more impressive to me.
- Did you align these with the previous tile? No, we worked from the center of the room out after watching this video tutorial.
- Was there any prep work? Thorough cleaning of dust and grime! My husband likes to clean so I stepped aside for this ;).
- How do they look in person? From a distance – amazing! Up close these tiles don’t look as nice to me because of the seams and overall vinyl sheen/texture…but overall an improvement for sure.
- Can you use these in a bathroom or kitchen? Yes, you CAN. I personally would not use them in a high traffic area like a kitchen. While these CAN last many years there are drawbacks and I personally would just save up longer to get the floors you’ll really love in your kitchen. That is just me, so of course, do what makes your heart sing.
PROS AND CONS OF PEEL AND STICK TILE
- PROS – easy to install, removable (but good luck with the adhesive removal, a hairdryer can help melt the adhesive), budget friendly.
- CONS – tiles can shift and lift leaving unsightly gaps, aesthetically they don’t look as good as “real” flooring (be it hardwood or tile).
Again, for high traffic areas consider additional adhesive specific to vinyl tile adhesion.
Overall – for $100 I think this made a big impact and was an easy project (took about 3 hours) to tackle. We plan to teach ourselves how to tile in the future so eventually we are looking to replace this but I’m very happy with the results based on our investment (time and money).
If there’s something I missed please drop a comment below so others can see!

LS
April 1, 2020 at 10:32 amHello! If you made a mistake or didnt like the pattern after placing down a few, how easy or difficult is it to remove the adhesive. And is the glue underneath permanent or easy to clean off? I’m in a rental and if over time owner decides to remove dont want to make it a pain for them. Thanks in advance!
Rachel
April 4, 2020 at 6:08 pmHi!!!
You can use a hair dryer to loosen the adhesive and then you’d likely need something additional like Goo-Gone to remove what was left behind. We didn’t remove any tiles but it doesn’t seem like you couldn’t with some effort.
Thanks for stopping by!!
xx
Rachel
Lori
April 3, 2020 at 5:22 pmHi Rachel
Your new house is looking so beautiful and is so inspiring.
I sold my home and moved to a new state.
I sold off a lot of my things to make room for new as well.
I’m ready to pick an all over interior color.
I’m having a hard time between
Benjamin Moore classic gray or calm.
I know you have used both.
Which is a better interior color to paint the majority of my interior of my home? ( in your opinion)
Keep posting about your home. I love seeing the progress and your Amazing decorating ideas.
Thx Rachel
Rachel
April 4, 2020 at 6:09 pmHi Lori!!
I love both but if I were picking one I’d use CALM. I have that in more of the main living spaces (living room and kitchen) and Classic gray in our bathrooms and dining room.Congrats on your move!
Rachel
Gloria
April 4, 2020 at 1:53 pmYour laundry rooms looks fresh and comfortable. Thank you for sharing the peel and stick tile as I think this would work well in our master closet. We currently have carpet that desperately needs to come out but our master bathroom will need to be remodeled soon so I don’t want to spend to much on the closet since they are attached.
Rachel
April 4, 2020 at 6:10 pmGood luck with your remodel! Bathrooms bring such a wow factor when they’re redone!! I’d love to see pics.
XX
Rachel
JENNIFER BONCZEK
April 4, 2020 at 11:42 pmHi Rachel….My husband is so good at home reno!! We used grout able vinyl tile in our kitchen. The floor looks like stone and the grout which you can hardly see makes it look sooo awesome! We used a cheaper peel and stick flooring 2 years ago in the same kitchen which was not a good plan and wasted $$$. He also used waterproof pergo flooring in the bathroom..which also came out amazing. Thankfully we got these projects done during the winter when I was working…….no more home projects for a long time now. I will have to get pleasure enjoying others projects!!!
Jackie
April 21, 2020 at 1:09 pmHi Rachel. I love the cabinet color! Did you paint them yourself and if so how difficult was it? Any advice on using the paint you recommended?
Rachel
April 21, 2020 at 2:19 pmHi Jackie! The paint color is linked in the post – it’s called “Vintage”. I have a post that talk a little more about chalk paint here –> http://pinterestingplans.com/powder-room-makeover/
hope that helps!! thanks for stopping by 🙂